Shower Tiling Tips
We share some handy tips to consider when embarking on tiling your own shower.
Remember to use a water resistant and flexible adhesive and grout system to install the tiles as the adhesive and grout system has to accommodate any thermal expansion and contraction in the installation as a result of the water temperature.

Mix your cementitious adhesive and grout with TAL Bond, a latex additive which, when used as a total water replacement in the mix, will enhance the bond strength, water resistance and flexibility of the adhesive and grout system. This will however only offer a water-resistant finish and not a waterproof system, thus it is important that your shower enclosure is waterproofed prior to tiling. See our previous blog post to guide you on how to waterproof a shower: (insert link to previous blog entry on how to waterproof a shower)
Tips for shower walls:
- Determine how many tiles will fit the wall by measuring the area. This will assist you in identifying whether a cut tile (half tile) is required at each end. Remember to leave room for TAL TileMate Tile Spacers, and allow for movement joints in horizontal and vertical corners.
- Use this measurement to determine whether you need to move the layout to allow for a wider tile in the corner. Avoid having to cut narrow tiles to fit the corners. Rather plan for the widest possible corner tile for the most attractive tile job. Remember to allow for the cut tiles in each corner to be the same size.
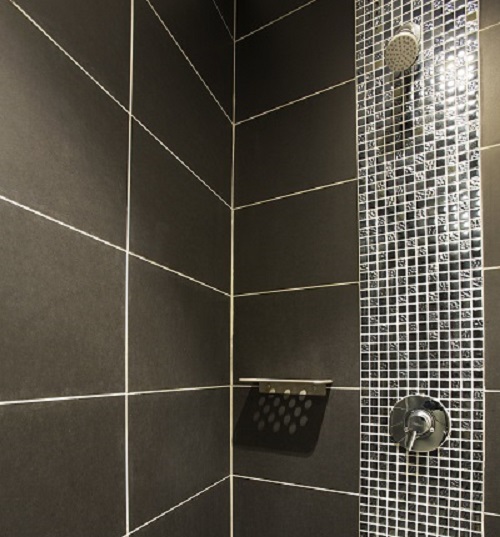
- Glass tiles provide an attractive finish, but some clear glass tiles can show moisture trapped behind the tiles after just a few showers. Rather select smaller coloured glass tiles such as mosaics as they’re less likely to trap moisture.
- Another point to consider is that small mosaic tiles and their grout lines are difficult to keep clean. For ease of cleaning opt for larger tiles with fewer grout lines.
- Large-format tiles used throughout the shower and bathroom tile installation can make the room appear much bigger than it is.
- If your shower has a built-in bench for sitting, incorporate a bullnose for the edge of the bench. A smooth curved edge is more forgiving on the back of the legs.
Tips for shower floors:
- Lay out the tiles on the floor and use the wall measurement to determine how wide the corner tiles will be. Remember to leave room for TAL TileMate Tile Spacers, and allow for a movement joint around the perimeter of the shower floor.
- Make sure that the reinforcing mesh on the backs of certain mosaics, that is the fixative and tabs, are water resistant.
- Glass tiles and mosaics require a specific tile adhesive to install them. Contact our technical advice line if you’re unsure about the adhesive to use: 0860 000 TAL(825)
- Smaller tiles offer more grout lines and therefore more traction and slip-resistance. If you’re not keen on using smaller tiles or mosaics, opt for a large-format textured tile.
- If the main tile you’ve selected doesn’t offer good slip-resistance on the floor, an option is to cut the large tile into smaller squares or strips for the centre of the floor. Alternatively, use mosaics in the centre. You can then frame the smaller tiles or mosaics with the larger tile cut into rectangular strips. You’ll have to join the strips at a 45-degree angle to form the corners so that they can tip into the shower and give you the slope you need for drainage.
Use our handy Grout Calculator to determine how much grout you’ll need. Remember to seal grout joints with TAL Goldstar Grout Sealer, an aerosol sealer that seals the top layer of the grout and minimises discolouration.
[Back]
blog comments powered by Disqus

