
TROWEL SIZE COUNTS!
A GUIDE TO SELECTING THE RIGHT TROWEL FOR TILES
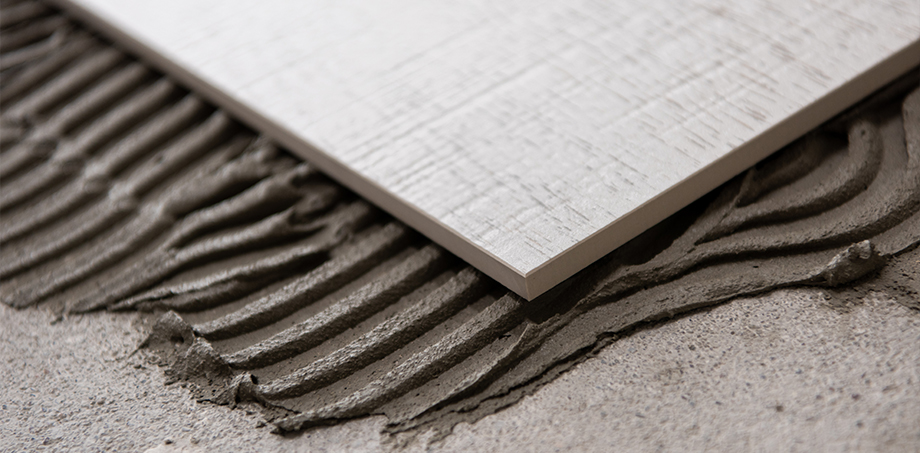
Getting your teeth into choosing the right trowel for a tile installation project is more important than you think! Trowel notches (the grooves created in the adhesive bed by the adhesive trowel) affect how much adhesive is applied, and what the end adhesive bed thickness will be.
NOTCHING UP
The size and spacing of the trowel teeth make up the notches. This determines the size of the trowel.
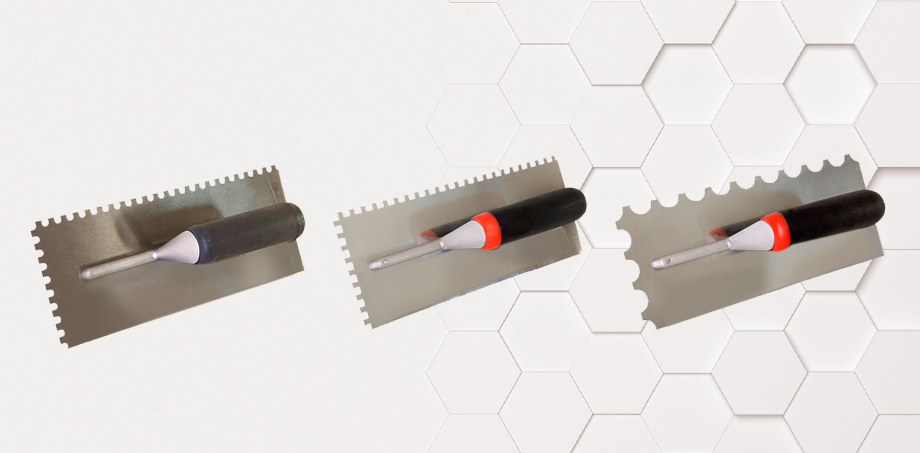
- The TAL 6mm square-notch trowel.
- The TAL 10mm square-notch trowel.
- The TAL 20mm round-notch trowel.
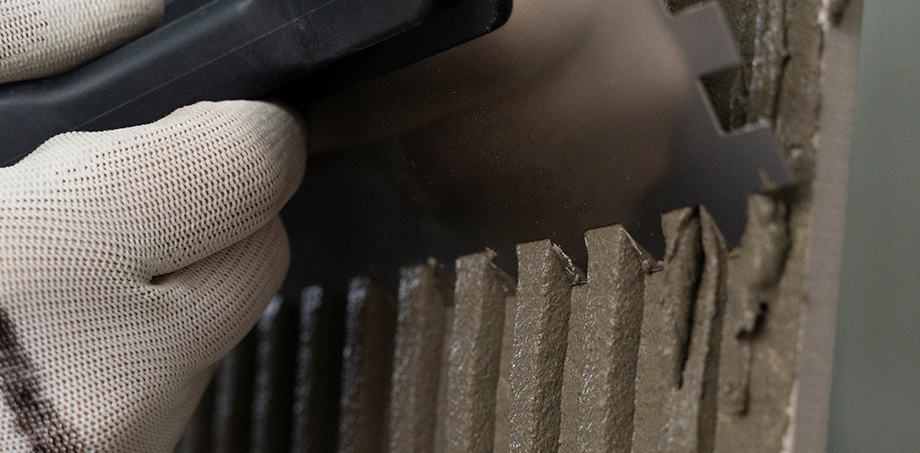
TALs notched trowels also have a flat, or straight edge on both the short and long sides of the trowel. These edges are used to apply and spread the adhesive onto the substrate before using the notched edges to “comb” through the adhesive to achieve the ridges and valleys.
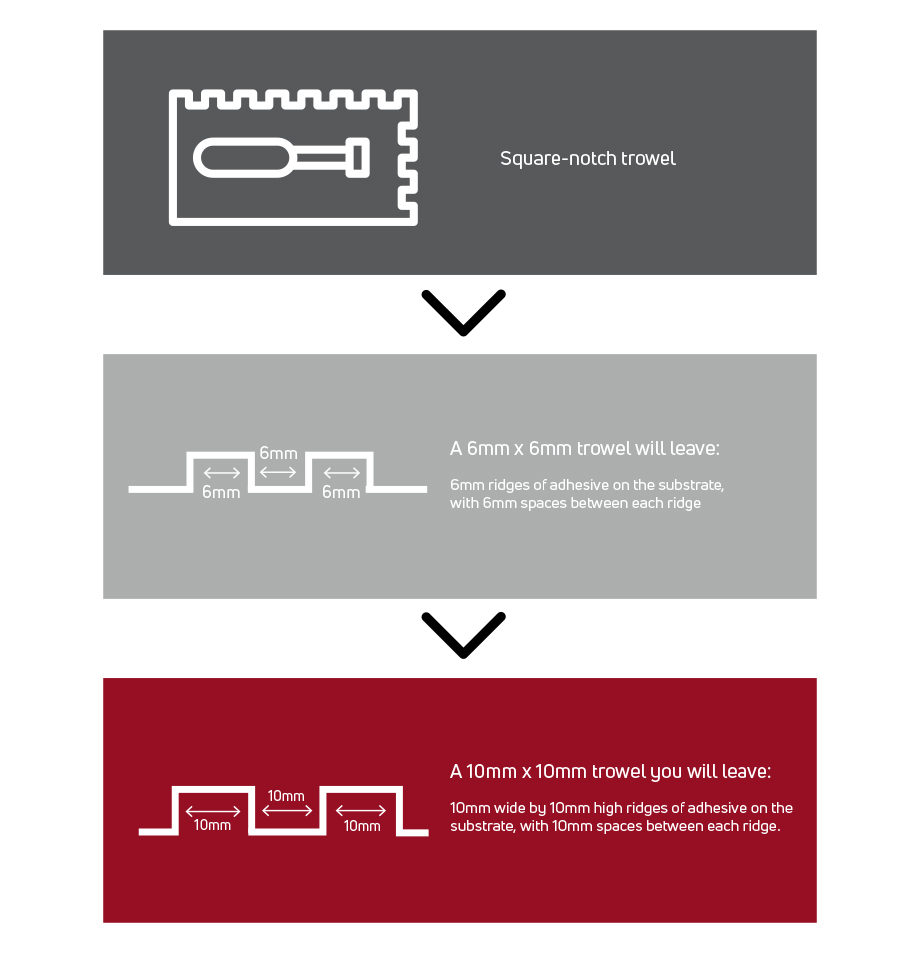
The size and type of trowel you choose will determine how much adhesive is sandwiched between the tile and the substrate once the tile is installed. When looking at trowel sizes, the measurement represents the width and depth of the notches (the distance between the teeth) e.g. 10mm (width) x 10mm (depth).
HOW MUCH ADHESIVE?
A little extra adhesive beneath a tile is completely acceptable – however too much or too little is problematic:
-
The maximum recommended adhesive thickness as stipulated by the adhesive manufacture should never be exceeded.
-
Thicker adhesive beds can take longer to set.
-
Trafficking over tiles before the adhesive has set sufficiently can result in hollow-sounding or loose tiles.
-
Insufficient adhesive, or voids and air pockets in the adhesive, will result in an impaired installation with poor results.
-
Tiled floors with inadequate adhesive coverage/contact will be susceptible to damage if something heavy is dropped on the floor, or something is moved over it with a heavy concentrated load.
The trowel size determines how much adhesive to put on the substrate, as well as how thick the bed of adhesive under the tile should be. A solid bed of tile adhesive of at least 5mm thick is stipulated beneath floor tiles, with TAL advocating a bed thickness of 6mm. This is usually achieved by the type of trowel you use.
_________________
Bed Thickness:
Also known as spread thickness, is the depth of the adhesive layer applied to the substrate
(such as a wall or floor), before placing tiles onto it.
_________________
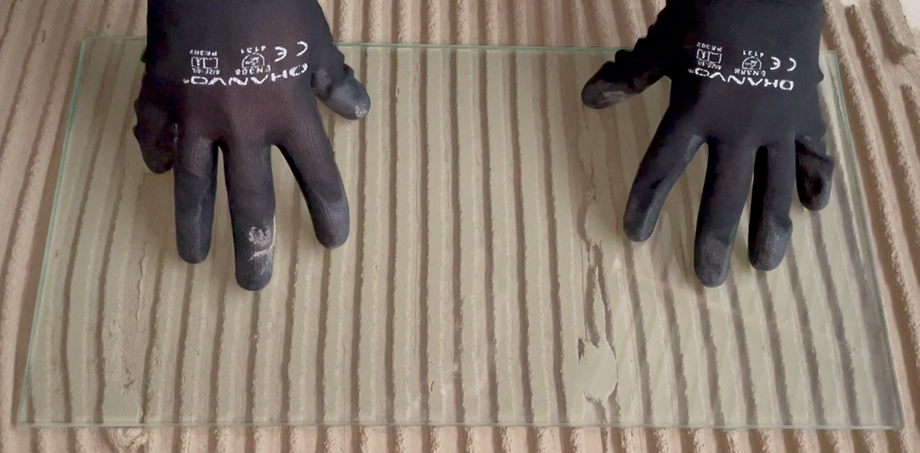
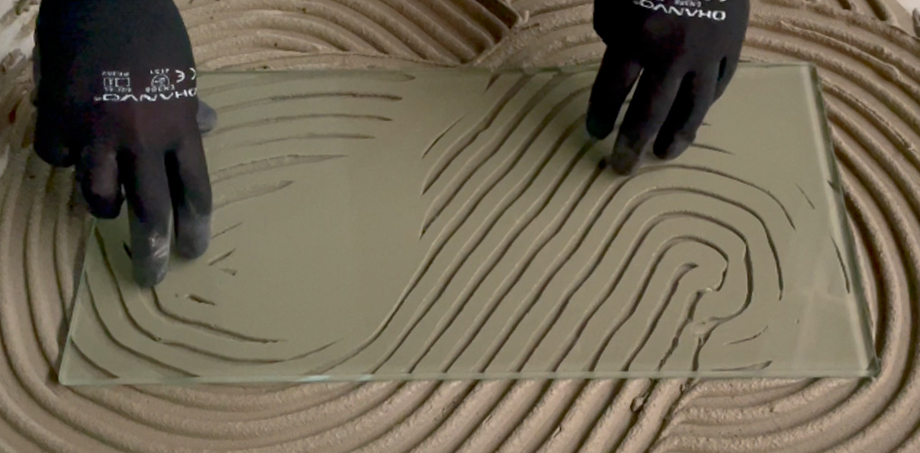
When you fully embed the tile into the bed of adhesive, it spreads out the adhesive ridges evenly into the spaces between the trowel lines.
Since the spaces between the ridges have the same size as the ridges themselves, this will split the height of the ridges in half:
-
When held at a 90-degree angle to the substrate, a square notched trowel with 6mm x 6 mm notches should result in a 3mm thick bed of adhesive beneath the tile. The same applies to 10mm x 10mm notches resulting in a 5mm thick bed of adhesive beneath the tile.
-
A 20 x 20mm notched trowel, often referred to as a “thick bed” floor trowel, should result in a 10mm adhesive bed after the tile has been bedded.
-
The more uneven the substrate and the less flat the tile is, the more adhesive you need beneath it, which means a larger trowel size is required.
-
Workmanship also plays a vital role:
- Tiles should be firmly bedded into the adhesive with a “twisting” action to ensure full contact between the adhesive and tiles.
- Tiles should also be well tapped home to ensure they are properly bedded.
-
It is good practice to remove the occasional tile to ensure that good coverage and contact has been achieved. Prominent ridges in the adhesive bed, and minimal adhesive transfer on the tile, after removal is indicative that they were not properly bedded into the adhesive, as the adhesive ridges had not flattened out to fill the valleys left by the trowel application.
_________________
Adhesive coverage depends on a number of factors, including trowel size!
Avoid running out, or having excess material.
Read more in our blog: “Calculating tile adhesive – don’t let this become a sticky subject!”
_________________
BUY THE RIGHT PRODUCT!
Finally, make sure to buy the right adhesive for your project.
Click here for a link to TAL’s adhesive range and a guide on which adhesive to use for specific tile installations.
For technical advice please contact our experts on 0860 000 825
or email: taltech@tal.co.za
[Back]
blog comments powered by Disqus


