
Tips when installing wood-look tiles
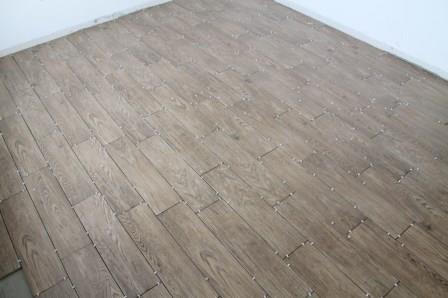
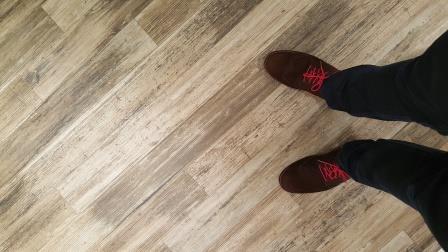
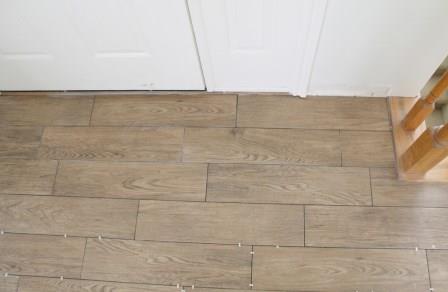
Installing wood-look tiles requires a bit of time and dedication, especially when the aim is to achieve natural wooden flooring patterns. Wood-look tiles with different shades per tile or box should be laid randomly, not according to the colours.
Many wood-look tiles are the length of (wood) planks and as such are 'large format tiles', which is a tile with the length of at least one edge equal to or greater than 600mm, or a facial area greater than 3500cm2. There are permissible manufacturing tolerances for ceramic and porcelain tiles, and large format tiles may have permissible surface flatness irregularities (i.e.: the tile surface may be 'curved' or 'bowed'). If this is not taken into consideration when planning the installation there is a risk of tile 'lipping' occurring. Lipping is when the edges and corners of the tiles stand proud from one another.
To minimise the risk of lipping it is important to ensure that the floor is level before starting the installation. TAL SCREEDMASTER, a self-smoothing underlayment, may be installed to achieve the required surface finish. Learn how to create a level and hardwearing floor surface through this TAL Talk blog post.
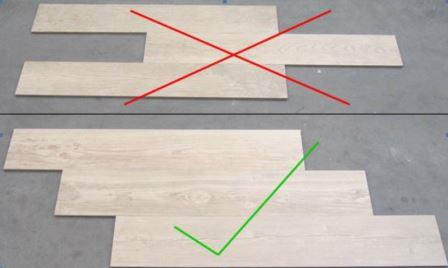
Laying of tiles in a brick or running bond pattern should also be carefully considered because of potential lipping caused by the curvature of large format tiles. A maximum offset of 30% is recommended.
Installing the tiles
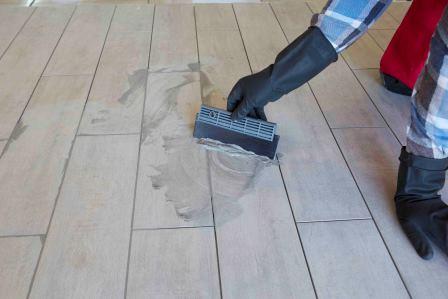
The first piece of each row should then be measured and cut to achieve the desired brick or running bond pattern. We recommend 'back buttering' of large format tiles with a thin coat of adhesive to ensure full contact with the prepared surface – this, in addition to applying the adhesive to the substrate using a suitable notched floor trowel, to ensure a solid bed of adhesive behind each tile.
Be sure to make use of the correct adhesive when fixing the tiles to the prepared surface. We offer a range of cement-based tile adhesives from rapid or quick to standard setting, in a grey or white colour. Click here to find out what adhesive is right for your choice of tile.
Also ensure that the spacer size you use is correct for the type of tile you have selected; the joint width between glazed ceramic floor tiles should be a minimum of 5mm wide, and a minimum of 3mm wide between porcelain tiles, including rectified porcelain tiles. To achieve the natural look, opt for grout colour that is darker than the tile itself. Click here to find out more about how to select the perfect grout colour.
Movement Joints
Allowance for movement (building, thermal and moisture) must be made in all tile installations. Perimeter joints must be installed around the perimeter of all floors and around any fixtures protruding through the tile installation, such as walls, columns and stairs. Intermediate tile panel movement joints should also be installed at maximum 5 metre centres in both directions for interior surface bed applications, and maximum 3 metre centres for suspended slabs and exterior applications. These joints must be a minimum of 5mm wide, must extend through the tile and tile adhesive layers to the substrate, and must be filled with a good quality resilient joint sealant and suitable backing cord.
 |
 |
When using large format tiles (a tile with the length of at least one edge equal to/greater than 600mm, or a facial area greater than 3500cm²) there will be a smaller number of grout joints, compared with the same area of normal format tiling. As a result, less stress (movement) can be accommodated at tile joints.
Considering a wood-look tile installation? Give us a call or send usan email and we’ll give the right advice, no matter how big or small your tile installation: 0860000 TAL (825) or taltech@tal.co.za. If this TAL Talk blog post interested you, you may want to take a look at this TAL Talk blog post: The 101 on wood-look tiles.
[Back]
blog comments powered by Disqus


